(Also available in Pyret)
Students choose, import, scale and orient images for their game, practicing reading comments to make sense of and begin to edit a large body of code.
Lesson Goals |
Students will be able to:
|
Student-Facing Lesson Goals |
|
Materials |
|
Preparation |
|
Key Points for the Facilitator |
|
Click here to see the prior unit-based version.
- define
-
to associate a descriptive name with a value
- function
-
a mathematical object that consumes inputs and produces an output
- image
-
a type of data for pictures
- interactions area
-
the right-most text box in the Editor, where expressions are entered to be evaluated
🔗The Game Starter File 15 minutes
Overview
This activity is primarily about review and reading comprehension, in which students open a large and unfamiliar file and must make sense of it using what they’ve seen before.
Launch
Students should have their workbook, pencil, and be logged into WeScheme and have their completed “Game Design” worksheet.
By now you’ve learned about defining values, composing functions, and reading contracts. Taken together, that’s a lot of code you’re now able to understand! It’s time to flex your reading skills, and look at the file you’ll be working with to build your video game.
This file has code you haven’t seen before! And that’s ok! For now, see what parts you recognize, and make sure you understand them.
Investigate
With their partner, students should load the Blank Game Starter File (Wescheme).
Notice and Wonder As students investigate the Game Starter File file with their partner, ask students to record what they Notice, and then what they Wonder. |
Synthesize
-
What familiar things did you see in the Game Starter File file?
-
What were some unfamiliar things? Any idea what they might do? Answers vary: new functions, comments, images
-
What data type is
GAME-TITLE? What data type isBACKGROUND?GAME-TITLEis a String,BACKGROUNDis an Image -
What does
SCREENSHOTreturn in the Interactions area? An image of theBACKGROUND,PLAYER,TARGET, andDANGERall together -
Did anyone try pressing "Run"? What happens when you press "Run"? Allow students to discuss what they see and what connections they see with the code
-
What do you think
image-urldoes?
What is SCREENSHOT? The Game Starter File defines several image values, such as |
🔗Finding Your Game Images flexible
Overview
This activity is all about finding the right images for students' games. Since the internet never has exactly the right image, students' need to get their games just right motivates them to confront the need for dilation, rotation, and reflection of the images they find. This, in turn feeds back into their understanding of Contracts and Function Composition.
Launch
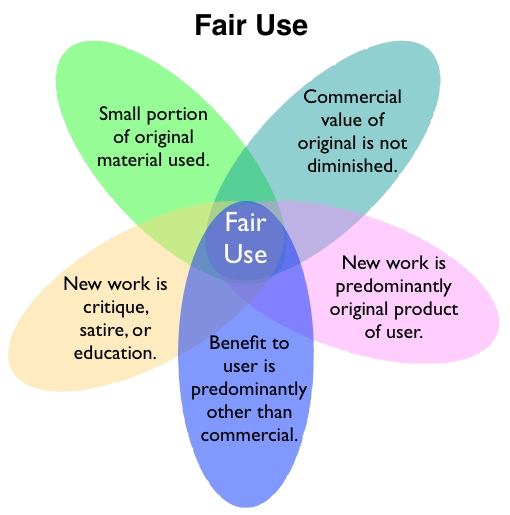
Copyright and Fair Use Fair Use Diagram, Source:
https://www.resourcesforlife.com/docs/item6247
|
Guide the students through finding an image, saving it to their Drive, importing it into their program, and defining the image value as PLAYER.
Students will change this image later on their own, this is just for teaching purposes.
How to find and save images to Google Drive….
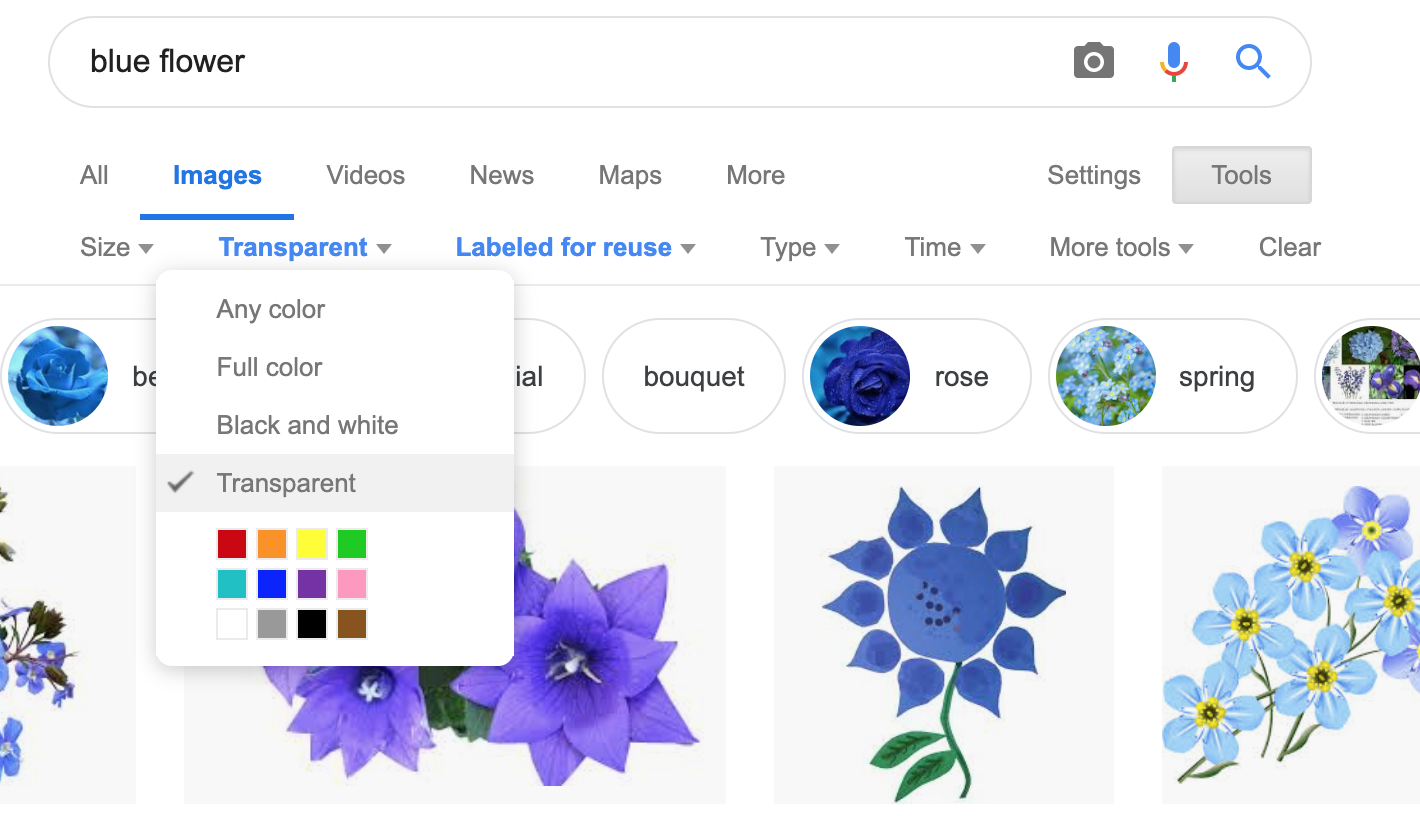
In your favorite search engine (we recommend DuckDuckGo), search for an image and then click "Images". Click "All Types" and select "Transparent" (In Google Image Search, it’s under "Color -> Transparent"). This will filter and display images that have a transparent background, appearing as a light white/grey checkerboard pattern behind the character.
Finding Images on
GIS, Source: Google Image Search, https://images.google.com
 🖼Show image
Once an image has been selected, click it to expand and save the image to Google Drive. For file management, students may want to create a folder to store their game images.
-
If using a Chromebook, this is done by right-clicking and selecting "Google Drive" on the left for the save location.
-
On a PC or Mac follow this, quick guide to saving images to drive.
Once the image is saved to Google Drive, it can be brought into the program by using the
"Images"
button. This will automatically bring in the image using the
bitmap-url
function, and students can run the code to see the image.
Investigate
What happens if the image we find needs to be made bigger or smaller? What if it needs to be rotated, or flipped?
Students can define the image as a value and make changes to it with the image manipulation functions scale, rotate, flip-horizontal, and flip-vertical.
Strategies for English Language Learners MLR 8 - Discussion Supports: As students discuss, rephrase responses as questions and encourage precision in the words being used to reinforce the meanings behind some of the functions, such as |
With their partner, students search the Internet for images to use in their game. They will need 4 images, one for each visual element of their game:
-
BACKGROUND -
PLAYER -
DANGER -
TARGET
Students should:
-
Save the chosen images to their Drive
-
Bring them into the programming environment
-
Define the images as values
-
Plan out how to resize and reorient them in their game
-
Make sure the final version of each image is defined as either
BACKGROUND,TARGET,DANGER, orPLAYER
When finished, students should be able to type SCREENSHOT in the interactions window and see all four of their images appropriately sized and oriented.
These materials were developed partly through support of the National Science Foundation,
(awards 1042210, 1535276, 1648684, and 1738598).  Bootstrap by the Bootstrap Community is licensed under a Creative Commons 4.0 Unported License. This license does not grant permission to run training or professional development. Offering training or professional development with materials substantially derived from Bootstrap must be approved in writing by a Bootstrap Director. Permissions beyond the scope of this license, such as to run training, may be available by contacting contact@BootstrapWorld.org.